Enterprise Ecosystem Integration
Overview
This use case demonstrates how to integrate MdlWr with enterprise systems like BMC Helix ITSM using MdlWr's robust logic flow and secure authentication features.
In many enterprise environments, legacy or external systems (such as BMC Helix) rely on complex authentication protocols like JSON Web Tokens (JWT) signed via private keys (arjwt). If the calling application cannot natively generate these specialized tokens, MdlWr acts as an intelligent middleware bridge:
The external application authenticates securely with MdlWr using a static API key (x-api-key).
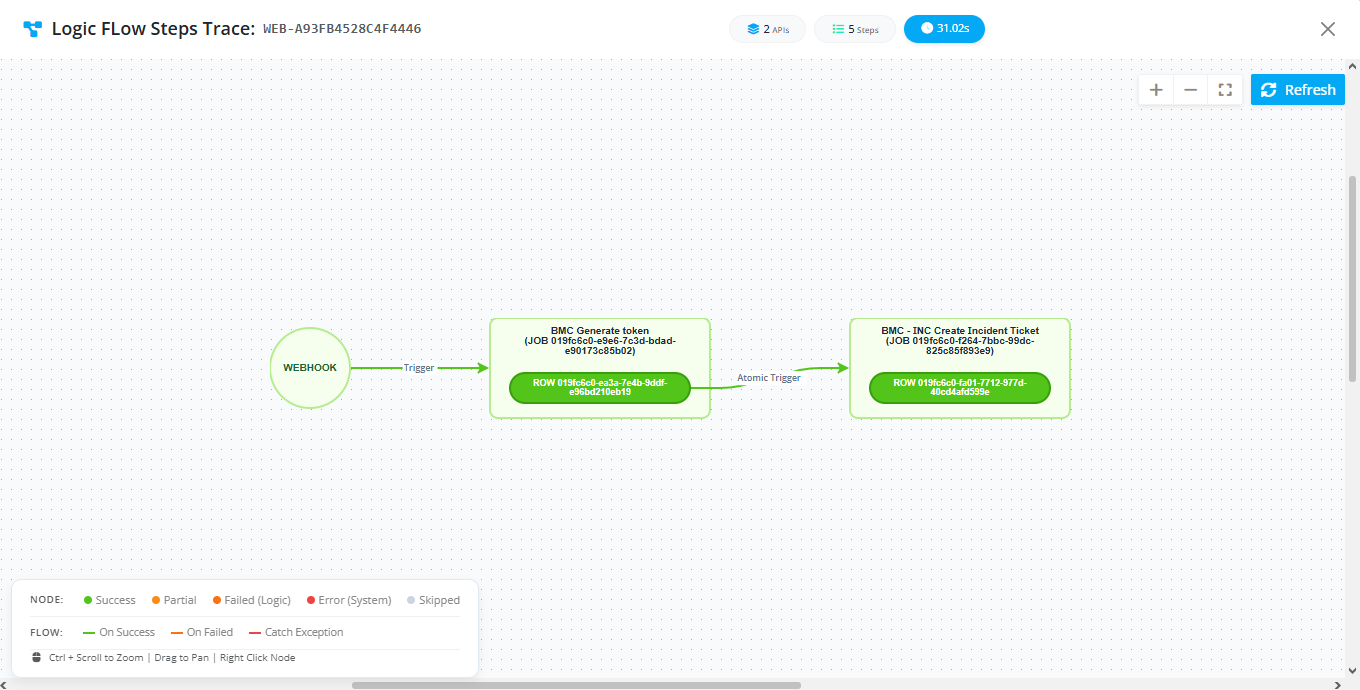
MdlWr intercepts the request, generates the required BMC Helix token dynamically within a logic flow, and securely relays the payload to BMC Helix to create tickets automatically.
Prerequisites & Architecture Workflow
[ External App ]
      │ (Sends payload with x-api-key)
      ▼
   [ MdlWr ] ──(1. Validates API Key)
      │
      ├──(2. Executes Logic Flow)
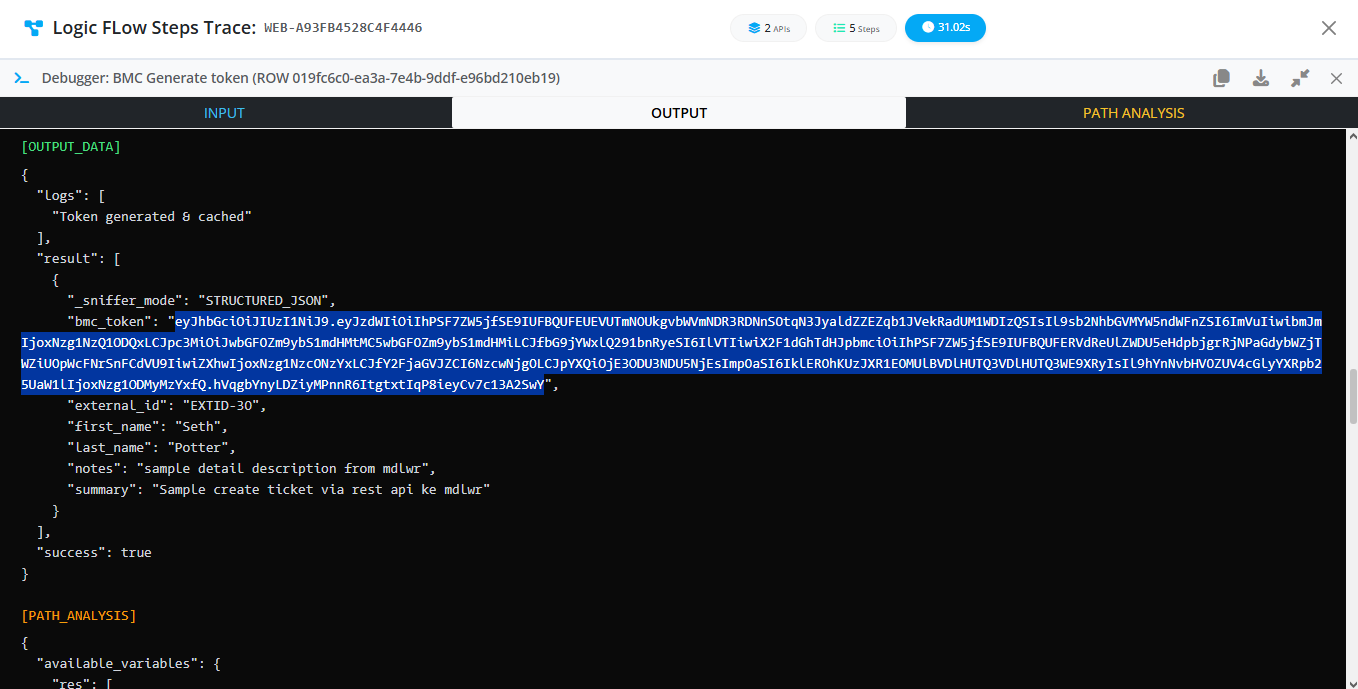
      │     ├── Generates BMC Helix arjwt Token
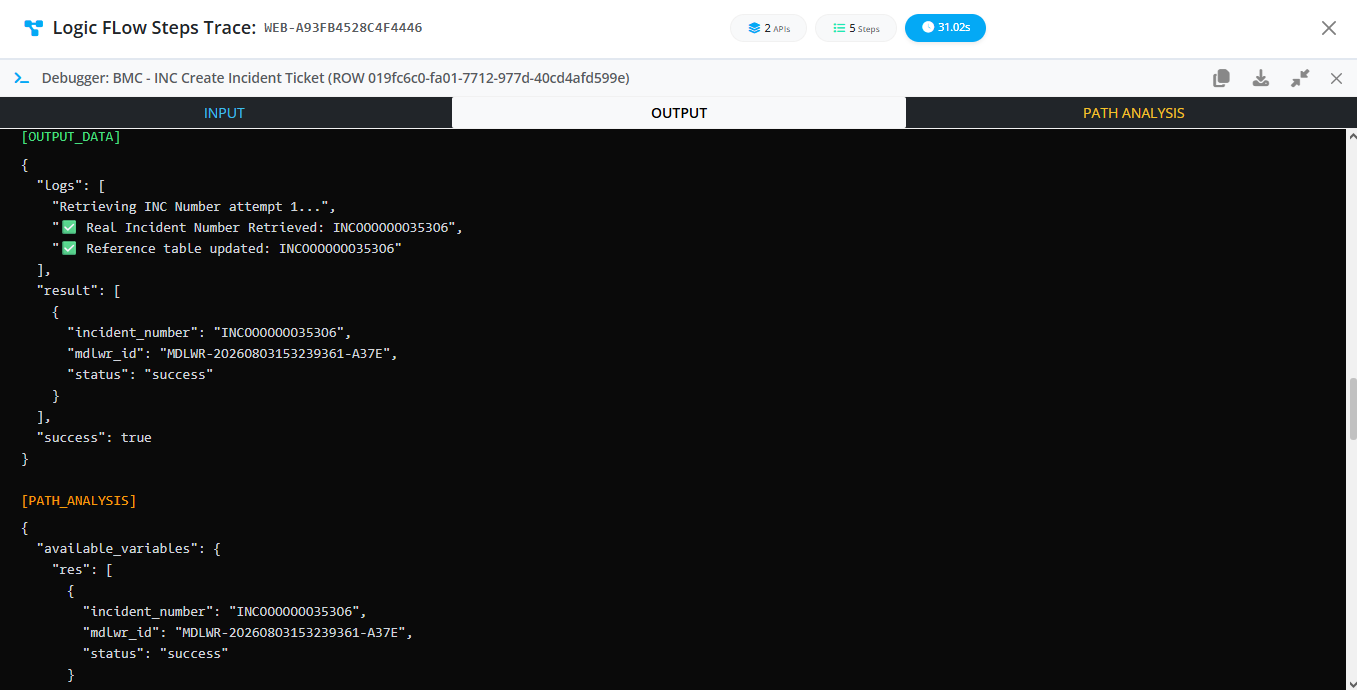
      │     └── Posts Ticket (Incident) Creation Payload
      │
      ▼
[ BMC Helix ITSM ] (Incident Created)
Follow the step-by-step implementation guide below to configure this integration.
Step-by-Step Implementation Guide
Step 1: Create a Dedicated API User (Admin Action)
First, an Administrator needs to create a specific user account in MdlWr that your external application will use for authentication and tracking.
-
Navigate to System > Users Management in the MdlWr dashboard.
-
Create a new user profile designated for your application integration (e.g.,
helix_integration_user).For details, see the Users Management Guide.
Step 2: Generate the API Token (User Profile)
Generate a secure authentication token linked to the user account created in Step 1.
-
Log in to MdlWr using the integration user account.
-
Go to your Profile page (click the user icon in the top-right header > Settings).
-
Under the My API Keys section, click the
+(Generate New API Key) button and provide a name (e.g.,BMC Helix Integration). -
Copy the raw key immediately from the security modal as it is only shown once.
-
Store this key securely in your external application’s environment configuration as the
x-api-keyheader.Note: If you lose the token or it expires, you can generate a new one or revoke old keys directly from your Profile page. (For full instructions, refer to the User Profile Guide.)
Step 3: Configure BMC Helix Credentials in MdlWr
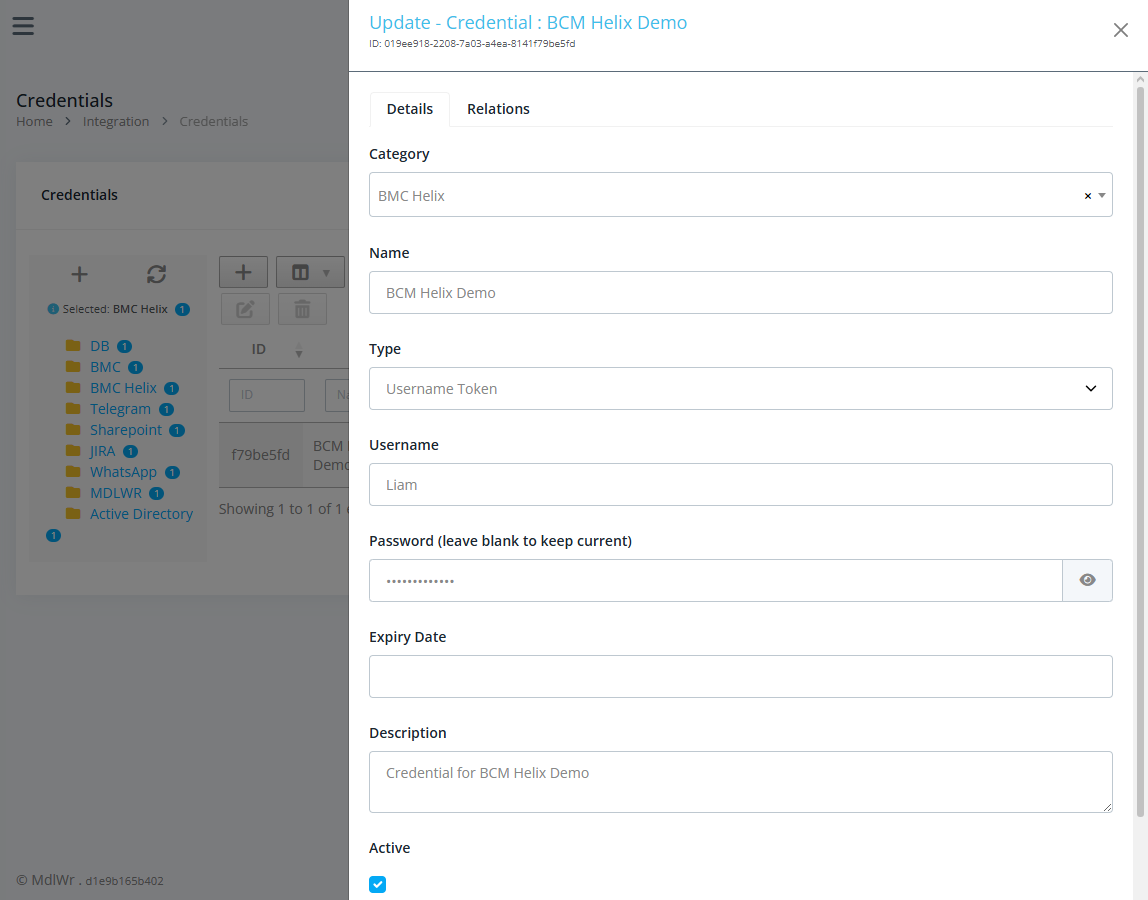
Store your BMC Helix target credentials safely within MdlWr's credential manager.
-
Navigate to Integration > Credential.
-
Create a new credential entry for BMC Helix.
-
Input your BMC Helix connection parameters, including target base URL, username, and password. Save the configuration.
Step 4: Build the Logic Flow
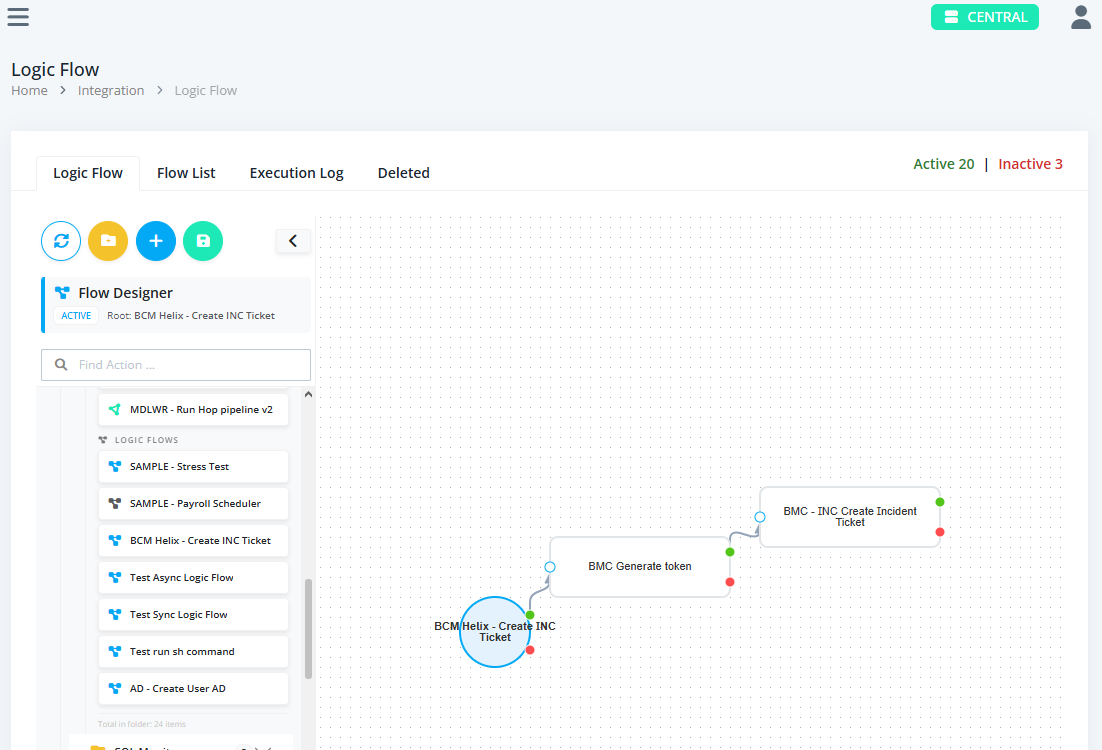
Combine credential mapping, token generation, and incident creation into a streamlined automated sequence.
-
Navigate to Integration > Logic Flows.
-
Create a new flow configured as Async.
-
Build your execution steps using MdlWr's built-in modular components:
-
Step A (Credential Reference): Load the BMC Helix credentials created in Step 3.
-
Step B (Token Generation): Utilize the pre-built utility block located under
BMC > BMC Generate tokenprovided natively by MdlWr to generate the requiredarjwttoken. -
Step C (Create Ticket): Utilize the pre-built action block located under
BCM > BMC - INC Create Incident Ticketto push the payload and establish the incident record inside BMC Helix.
-
-
Add a sample payload value in the description. You can copy it from the
BCM Helix > BMC - INC Create Incident TicketAPI description. This will automatically populate the request body when you test the logic flow via the Flow Tester.
Step 5: Test the Integration via Flow Tester
Verify that your configured pipeline functions end-to-end before routing live production traffic.
{
    "first_name": "Seth",
    "last_name": "Potter",
    "summary": "Sample create ticket via rest api from MdlWr",
    "notes": "sample detail description from MdlWr",
    "external_id": "EXTID-60"
}
-
Navigate to System > Flow Tester.
-
Select the logic flow you built in Step 4 via the folder browser icon.
-
Provide a test payload (or rely on the sample payload auto-filled from the logic flow description) and trigger the execution.
-
Review the real-time execution logs to ensure the token was generated successfully and the ticket was created in BMC Helix without errors.