Manual Guide: System Configuration
The Config page allows administrators to manage global parameters for the MdlWR platform, including email server configurations (SMTP), SSL certificate management for HTTPS security, and system logging policies.
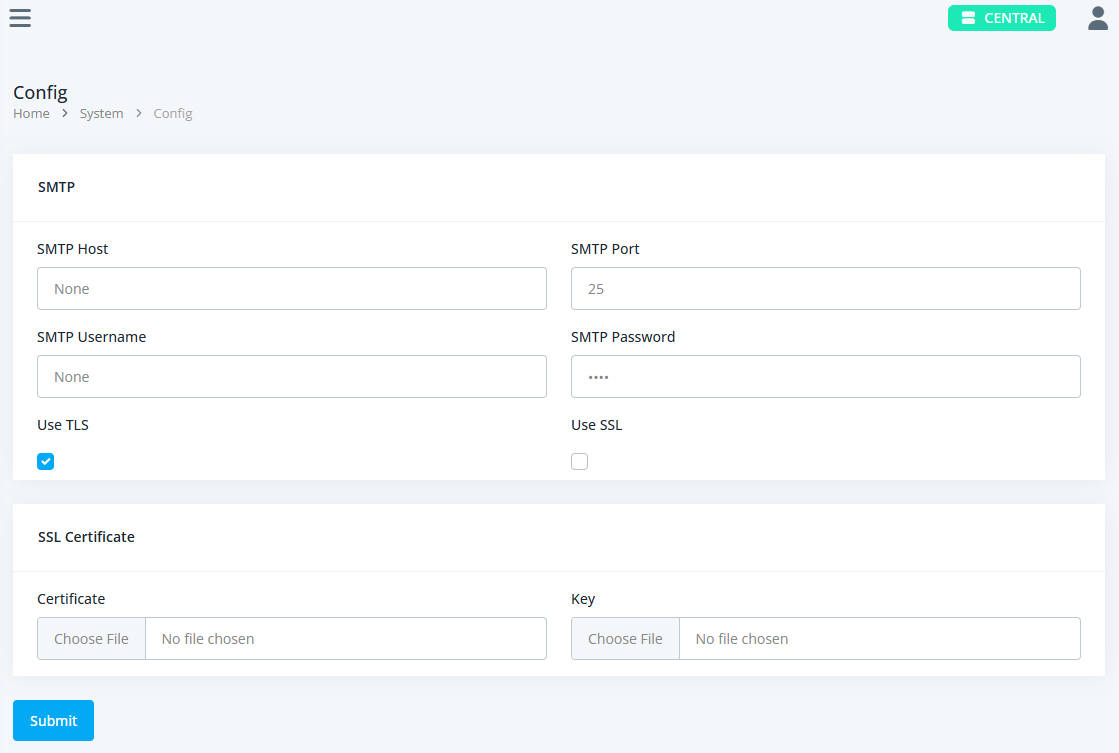
1. How to Access the Page
- Ensure you are logged into the MdlWR admin dashboard.
- In the main navigation menu, go to System.
- Click on the Config sub-menu.
- You will be directed to the system configuration page.
2. Configuration Sections
The settings form is divided into the following main sections:
A. SMTP (Email & Notifications)
This section is used to connect MdlWR to an external SMTP server so the system can send email notifications, reports, or error alerts.
| Field Name | Data Type | Description / How to Fill |
|---|---|---|
| SMTP Host | Text | The SMTP server address (e.g., smtp.gmail.com or a local server IP). |
| SMTP Port | Number | The port used by the SMTP server (e.g., 587 for TLS or 465 for SSL). |
| SMTP Username | Text | The username or email address of the sender account. |
| SMTP Password | Password | The password for the sender email account. |
| Use TLS | Checkbox | Check this if the SMTP server requires TLS encryption. |
| Use SSL | Checkbox | Check this if the SMTP server requires SSL encryption. |
B. SSL Certificate (HTTPS Security)
This section displays the status of the active SSL certificate used by the MdlWR platform and provides an interface to upload new certificates.
- Status Information: If a certificate is currently installed, the system displays:
- Filename: The name of the active certificate & key files (clickable to view details/file path).
- Expiry: The expiration date of the certificate. Note: The text will automatically turn red if the certificate is expired or nearing its expiration date.
- Upload Form:
- Certificate (
.crt/.pem): Select the SSL certificate file from your computer to upload. - Key (
.key): Select the corresponding Private Key file for your SSL certificate.
3. Saving Changes
- After filling in or updating the desired form fields (such as SMTP data or SSL files), review your inputs.
- Click the Submit button at the bottom of the page.
- A loading spinner icon will appear indicating that the save process is in progress.
- Upon success, a flash notification message will appear at the top of the page confirming that the configuration has been updated.